What is an MTR?
MTR (My Traceroute) is a Linux/Unix utility that combines Ping and Traceroute functions into one easy-to-use program. MTR is run on a computer to provide detailed hop test data (a series of brief measurements) which provides test results that are a combination of ping and Traceroute.
MTR continuously sends ping requests to each hop until the test has stopped with each hop in the path and will display the average % of packet loss, total packets sent and received, best, average, worst, and last latency test result.
Why Does Hivelocity Support Team Require MTRs?
MTRs are required in certain scenarios for the support team to understand and evaluate the route and potential packet loss with each hop. Normally, the team will require an MTR from the server to your workstation or other affected server, along with another from the workstation to the server.
MTR in Linux
What is the MTR Package in Linux?
The mtr package is a command-line network diagnostic tool that combines ping and traceroute into one program, It is also known as MyTraceRoute. The tool continuously sends packets and shows the response time and percentage of each hop from the local system to a destination host. The mtr package is an essential, real-time network diagnostic tool for your sysadmin toolbox.
Installing and Using in Linux
The procedure to install and use MTR in a Linux OS is described below.
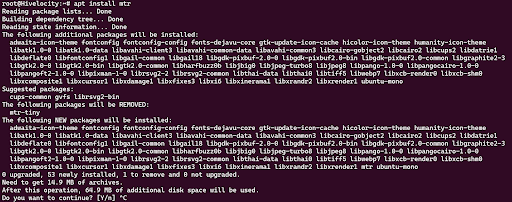
1. The mtr package should be already installed in your OS (Skip to step 2 to confirm). If it’s missing, proceed to download it using the following command. Note that the command can change depending on your package manager.
sudo apt install mtr

2. Once it is installed, we will run it using the following command fup to 2 minutes and until the destination is reached. If the destination is not reached, allow it to run for up to 2 minutes. For this example, we will use Google’s DNS server IP of 8.8.8.8.
mtr 8.8.8.8

3. Once the command is used a new display will appear displaying the task being done.

4. The MTR report can be provided to Hivelocity’s support team via a screenshot for further evaluation and interpretation.
How to Modify
The mtr package has various options to alter the output of the scan. A few examples are listed below with commands and explanations.
- mtr -4 – will use IPv4 only.
- mtr -6 – will use IPv6 only.
- mtr -c <count> – will send a number <count> of pings and exit.
- mtr -n – will not resolve hostnames to Ip addresses.


MTR in Windows
What is WinMTR?
WinMTR is a Windows clone of MTR and is managed directly within their UI which allows you to run MTRs via the Windows OS. In the app, you will enter the IP or domain name of the target host in the “Host” bar, and then press Start. This will continue sending packets until you press the Stop button. The report that is made later can be exported later.
Installing and Using in Windows
The procedure to install WinMTR in Windows can be found below.
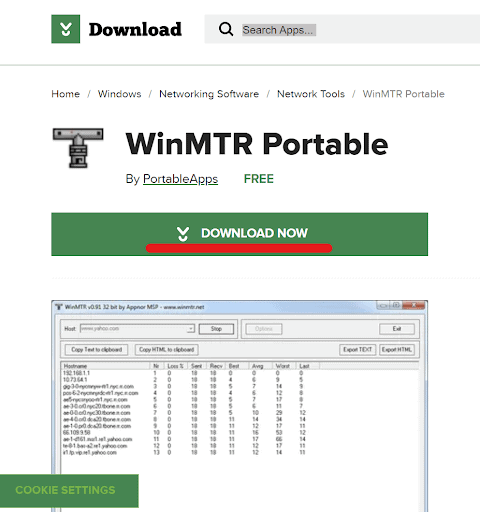
1. Proceed to the Cnet webpage to reach the download link for the portable version.
- Note that if the link is not working, using Google to search WinMTR should be sufficient.
2. Press on the “Download Now” to download the latest version, as shown below.

3. The next page will begin downloading the .exe file to your computer. Once the download is complete, begin installing the application.
4. Once the application has been installed, proceed to open the application.
5. In the application’s main screen, enter the IP you wish to run and press the Start button.

6. Run it for up to 2 minutes and until the destination is reached. If the destination is not reached, allow it to run for up to 2 minutes For this example we will use one of Google’s DNS server IP, 8.8.8.8 for the host IP part. An example task report can be found below.

7. The report can be provided to Hivelocity’s support team via a screenshot, by using the “Export HTML” option, or by using the “Export TEXT” option for further evaluation and interpretation.
How to Modify
Pressing the “Options” button will open various fields which can be modified. Most of the various options in that section should not be modified but what can often be used to provide a report with just IP addresses is to uncheck the “Resolve names” option. Once that has been performed, run the task once more.

