A VPS is a virtual machine that runs on a shared physical server with other VPSs. A virtual console of a VPS is a feature that allows you to access and control your virtual private server from Hivelocity using a web browser.
Using a virtual console you can perform various tasks on your VPS, such as installing software, configuring settings, troubleshooting issues, and rebooting the system. The usage of a virtual console can be very useful when you cannot access your VPS through other methods, such as SSH or FTP, and in instances where network connectivity is lost.
Accessing the VPS Virtual Console
To Access your VPS virtual console, follow these 5 steps:
- First, head over to Hivelocity.net and log in to the myVelocity customer portal.
- Once you’ve gone through the login process, the screen below will appear, listing all of your current devices.
- You can note which device is VPS and which is a dedicated server by looking at the Type column as needed.

- You can note which device is VPS and which is a dedicated server by looking at the Type column as needed.
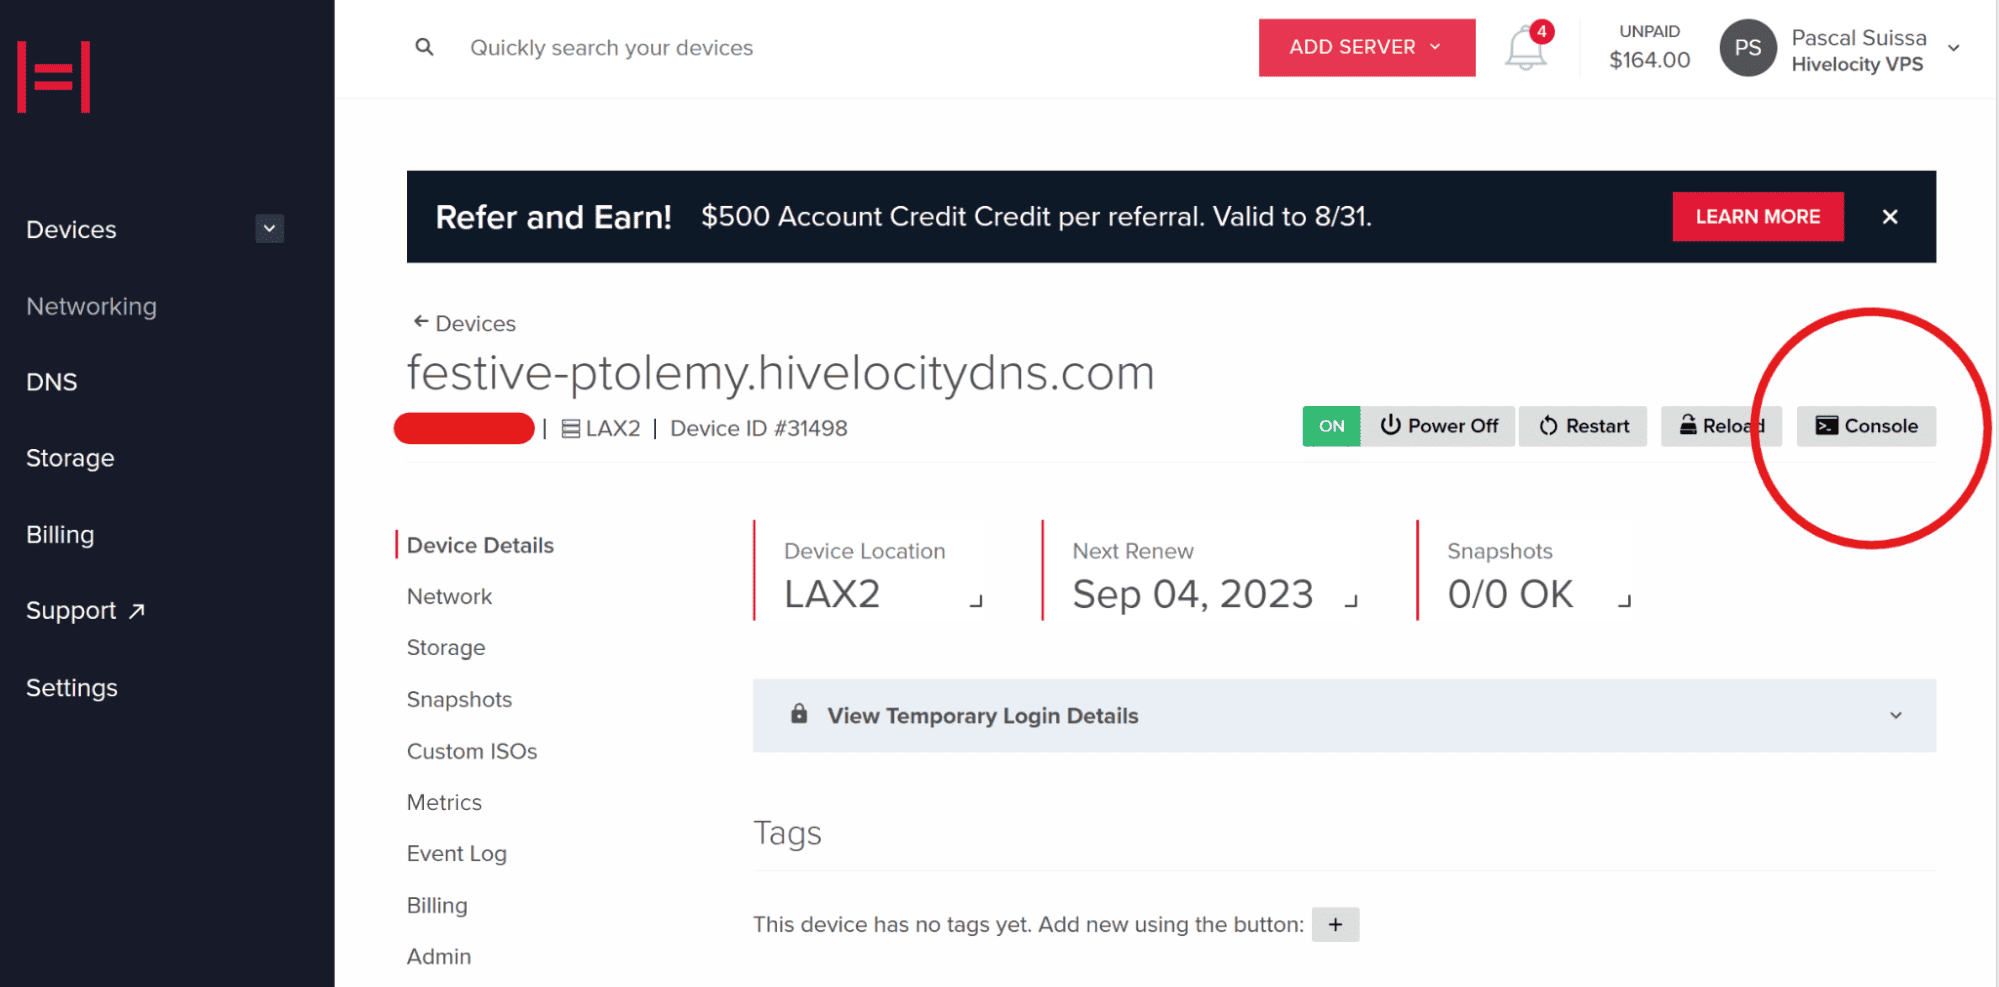
- Select the device ID you wish to use the virtual console with. For this example, we will select device 31498 from the list above.
- In the next screen, you can view further information regarding your VPS along with the option to press the Console button which will open a new window within your virtual console.

- With the virtual console open, we can then proceed to log in to your VPS from the browser.

Important Usage Information
It is important to note the following items when using the virtual console for your VPS:
- If you close the console window and open it again, you will be logged into the active shell and return to the same spot you’ve left it. When you are done working with the virtual console, make sure to logout from your user account using Ctrl+D.
- Pasting text into the virtual console will not work. You have to type commands and passwords character by character.

– by Pascal Suissa