1) Login to your Windows server with the administrator user.
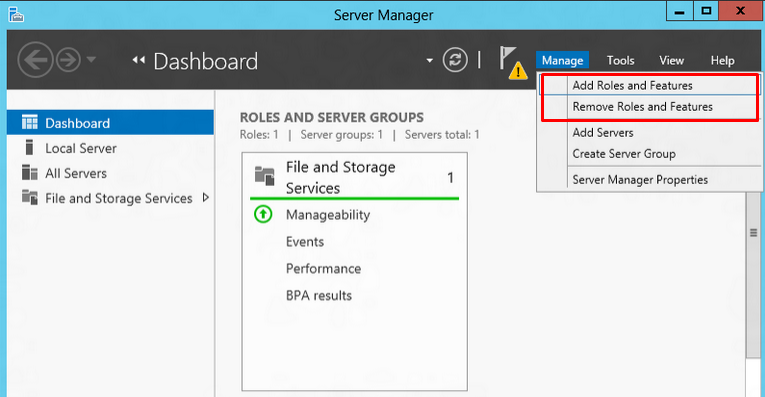
2) Open Server Manager.
3) Under Manage menu, select Add Roles and Features.
4) Select Role-based or Feature-based Installation. Click on Next

5) Select the appropriate server (We are installing IIS on local server so keep the local selected by default ). Click on next.
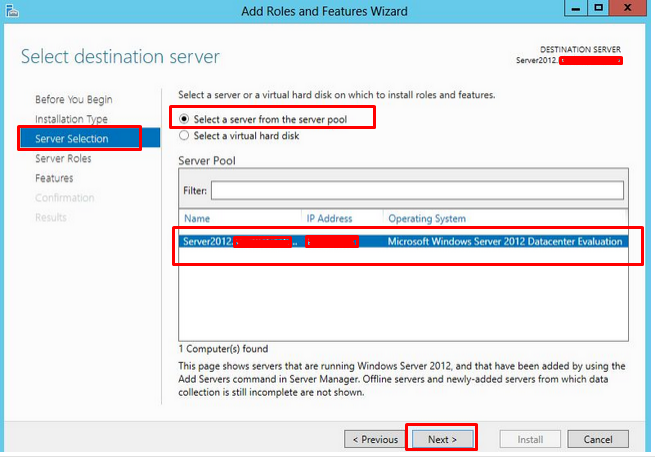
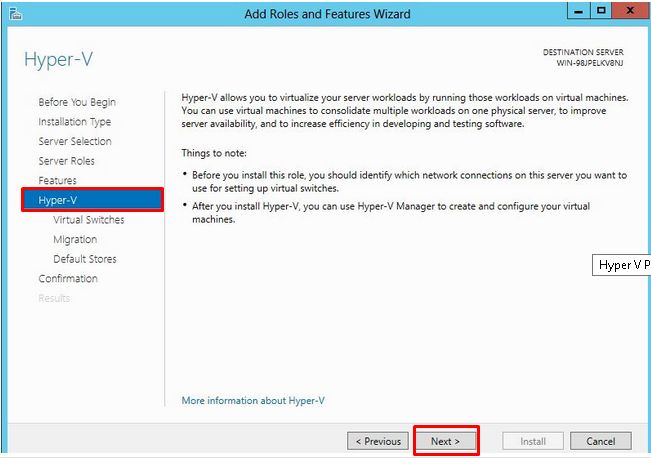
6) Select Hyper-V. Click on next.

7) Click on Add Features if you need additional features for the Hyper-V role.
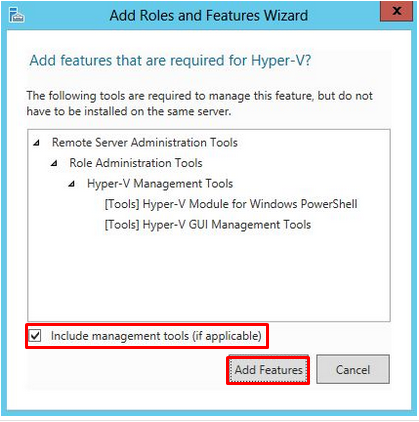
8) Now click Next button. Do not select any features in Features option and click Next button. Click Next button in above Hyper-V window.
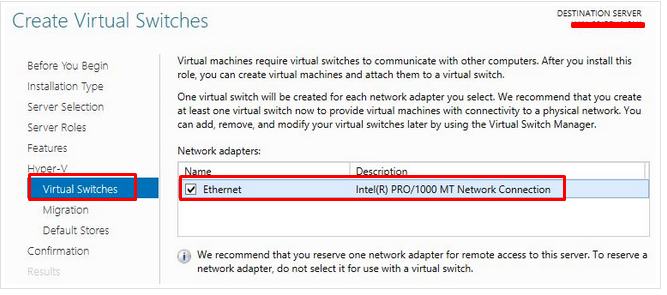
9) On the next screen select network adapter for virtual switches. Then click Next button. In Virtual Live Migration windows you can configure live migration later.
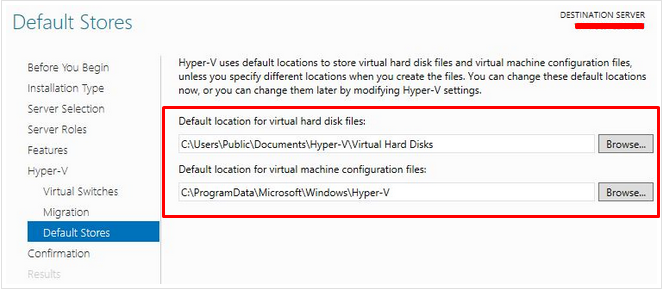
10) Configure the location to store Hyper-V virtual hard disk files. Click Next button.
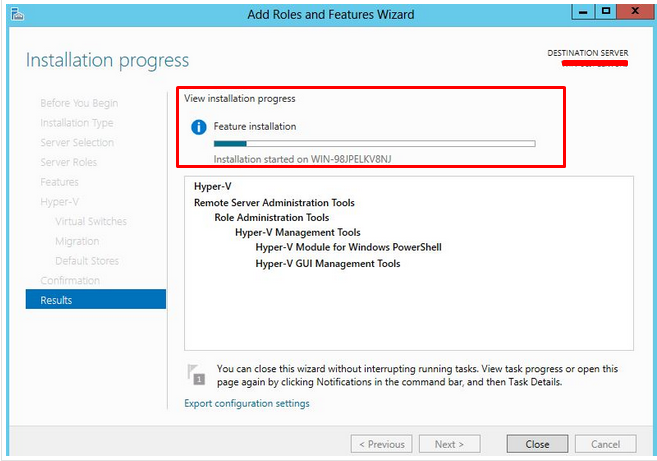
11) You can now see the installation information and confirm it by clicking Install button. After installation completes, restart the server.
