ConfigServer Firewall (or CSF) is a free and advanced firewall available for most Linux distributions, which manipulates iptables chains while also providing greater functionality that iptables doesn’t offer. In addition to the basic functionality of a firewall – filtering packets on IP addresses, services, and ports – CSF includes other security features, such as login/intrusion/flood detections. CSF also includes UI integration for cPanel, DirectAdmin, and Webmin.
CSF works by utilizing the Login Failure Daemon (lfd), which provides a tool that scans the latest log file entries for login attempts against your server. This is useful for detecting brute-force attacks, allowing lfd to automatically detect the pattern and block the offending IP.
*NOTE: These instructions are based on a live document that might change in the future, meaning it’s important to review it prior to proceeding. The instructions from the file have been tested and broken down below at the time of writing this article and include further troubleshooting information that is not present in the live document.
The file can be found in the following link – https://download.configserver.com/csf/install.txt
Installing ConfigServer Firewall (CSF)
To install CSF onto your Linux distribution, just follow along with the instructions below. *Note: Be sure to update your packages with package manager to ensure you have the latest versions available to you.
- First, in order to install CSF, you must log in to your server with root user.
- Next, before downloading CSF, make sure that you have the following packages installed on your system using sudo apt install followed by the name of the packages you’re installing:
- perl-libwww-perl and/or libwww-perlc (*Note: some distributions might not require or have these available)
- wget
- tar
- nano

- Now, navigate to the /usr/src directory
cd /usr/src

- Next, download the CSF installation pack (contained in a compressed tarball) using the following command:
wget https://download.configserver.com/csf.tgz

- The downloaded file is compressed, so it has to be uncompressed and extracted before it can be used. To extract the file, use the following command and hit enter.
tar -xzf csf.tgz

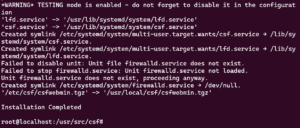
- Now it is time to execute the CSF’s installer script. Move to the csf directory (by using: cd /usr/src/csf) and execute the following installation script:
sh install.sh

*Note: If this fails with either an error stating “Can’t locate Net/SMTP.pm” or “Can’t locate Math/BigInt.pm“, then install perl-Net-SMTP-SSL perl-Math-BigInt and run the CSF installation script again.
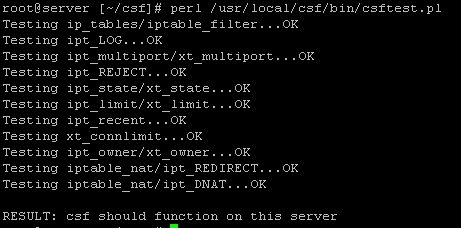
- Now that CSF is installed, run the following test script to ensure all prerequisites are present:
perl /usr/local/csf/bin/csftest.pl

- Assuming that everything is working correctly, the next step is to disable firewalld to reconfigure CSF using the following command:
systemctl stop firewalld
followed by
systemctl disable firewalld

- Next, edit /etc/csf/csf.conf to change the value of “TESTING = 1” to “TESTING = 0”. The item is present at the very top of the document.
*Note: Editing can be completed via nano or vim. Remember to save the file when you’ve finished making the edits.

- With your edits complete, the next step is to restart CSF using the following command:
systemctl restart {csf,lfd}
*Note: if you receive an error on AlmaLinux 9 or any other distro that says “Can’t locate lib.pm in @INC“, then the epel-release and perl packages need to be installed.
- Now, enable CSF and lfd and check whether the service is active using the following commandS:
systemctl enable {csf,lfd}
Followed by
systemctl is-active {csf,lfd}

- Lastly, you can check if the required iptables modules are available using the following command:
perl /usr/local/csf/bin/csftest.pl

If no fatal errors are reported, then the firewall should be working correctly.
And there you have it! If you have WHM installed on your server, you can also double-check that CSF is working properly by checking under WHM’s menu >> Plugins >> ConfigServer Security&Firewall.
Popular Links
Looking for more information on CSF? Search our Knowledge Base!
Interested in more articles about Security? Navigate to our Categories page using the bar on the left or check out these popular articles:
- How to Clear the YUM Cache
- How to Install Maldet and Run a Scan
- Reset the MySQL Root Password on Windows Server
Popular tags within this category include: YUM, Maldet, SSL, and more.
Don’t see what you’re looking for? Use the search bar at the top to search our entire Knowledge Base.
The Hivelocity Difference
Seeking a better Dedicated Server solution? In the market for Private Cloud or Colocation services? Check out Hivelocity’s extensive list of products for great deals and offers.
With best-in-class customer service, affordable pricing, a wide-range of fully-customizable options, and a network like no other, Hivelocity is the hosting solution you’ve been waiting for.
Unsure which of our services is best for your particular needs? Call or live chat with one of our sales agents today and see the difference Hivelocity can make for you.