-
Login to Plesk with the admin user
-
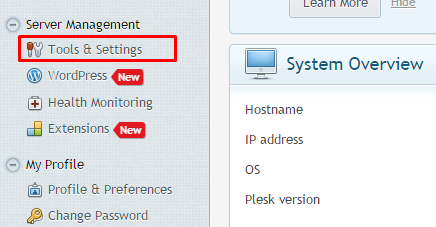
On the left hand side menu bar, select Tools & Settings under the Server management section.
-
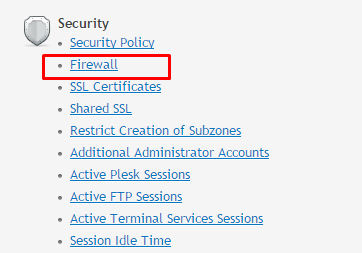
On the next page, click on the Firewall option under the security section.
-
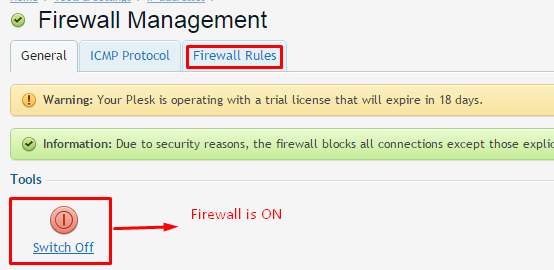
On the Firewall page, make sure that the Firewall is ON as shown in the image. Click on Firewall Rules.
-
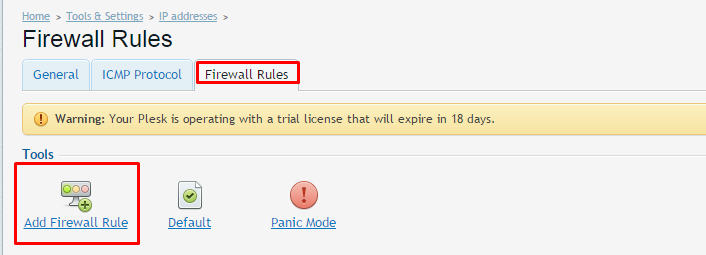
On the Firewall Rules page click on Add Firewall Rule
-
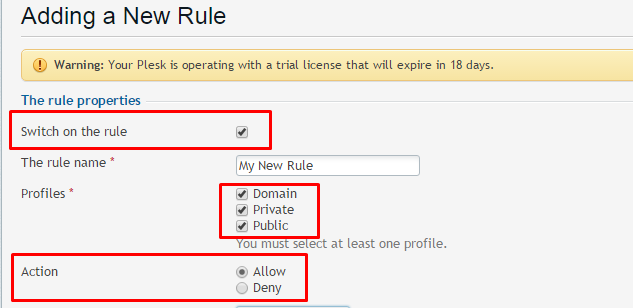
On the “Adding a New Rule” page, make sure the option of Switch on the rule is checked.
-
Specify the rule name in the box
-
Select all the profiles as shown in the image
-
For Action option click select Allow option
-
Specify the port range that is associated with your service or program as shown in the image and select the proper protocol as per the requirements of the service or program.

-
Under Remote Address box leave the default value All as it is OR if you want to restrict the access to a limited IP you can specify the IP in Add an IP address or a network box and then click on Add button.

-
Once you are done with filling all the values as per your requirements, click on the OK button and you can see the new firewall rule you just added.

How to configure a firewall rule in Plesk 12 (Windows)
Need More Personalized Help?
If you have any further issues, questions, or would like some assistance checking on this or anything else, please reach out to us from your my.hivelocity.net account and provide your server credentials within the encrypted field for the best possible security and support.
If you are unable to reach your my.hivelocity.net account or if you are on the go, please reach out from your valid my.hivelocity.net account email to us here at: support@hivelocity.net. We are also available to you through our phone and live chat system 24/7/365.