We understand there may come a time when you might wish to discontinue a VPS and proceed with its cancellation. Thankfully, this process is as simple as can be. Just follow the steps below to cancel your VPS at any time.
Canceling Your VPS
To cancel your VPS, follow these 7 steps:
- First, head over to Hivelocity.net and log in to the myVelocity customer portal.
- Once you’ve gone through the login process, the screen below will appear, listing all of your current devices.
- You can note which device is VPS and which is a dedicated server by looking at the Type column as needed.

- You can note which device is VPS and which is a dedicated server by looking at the Type column as needed.
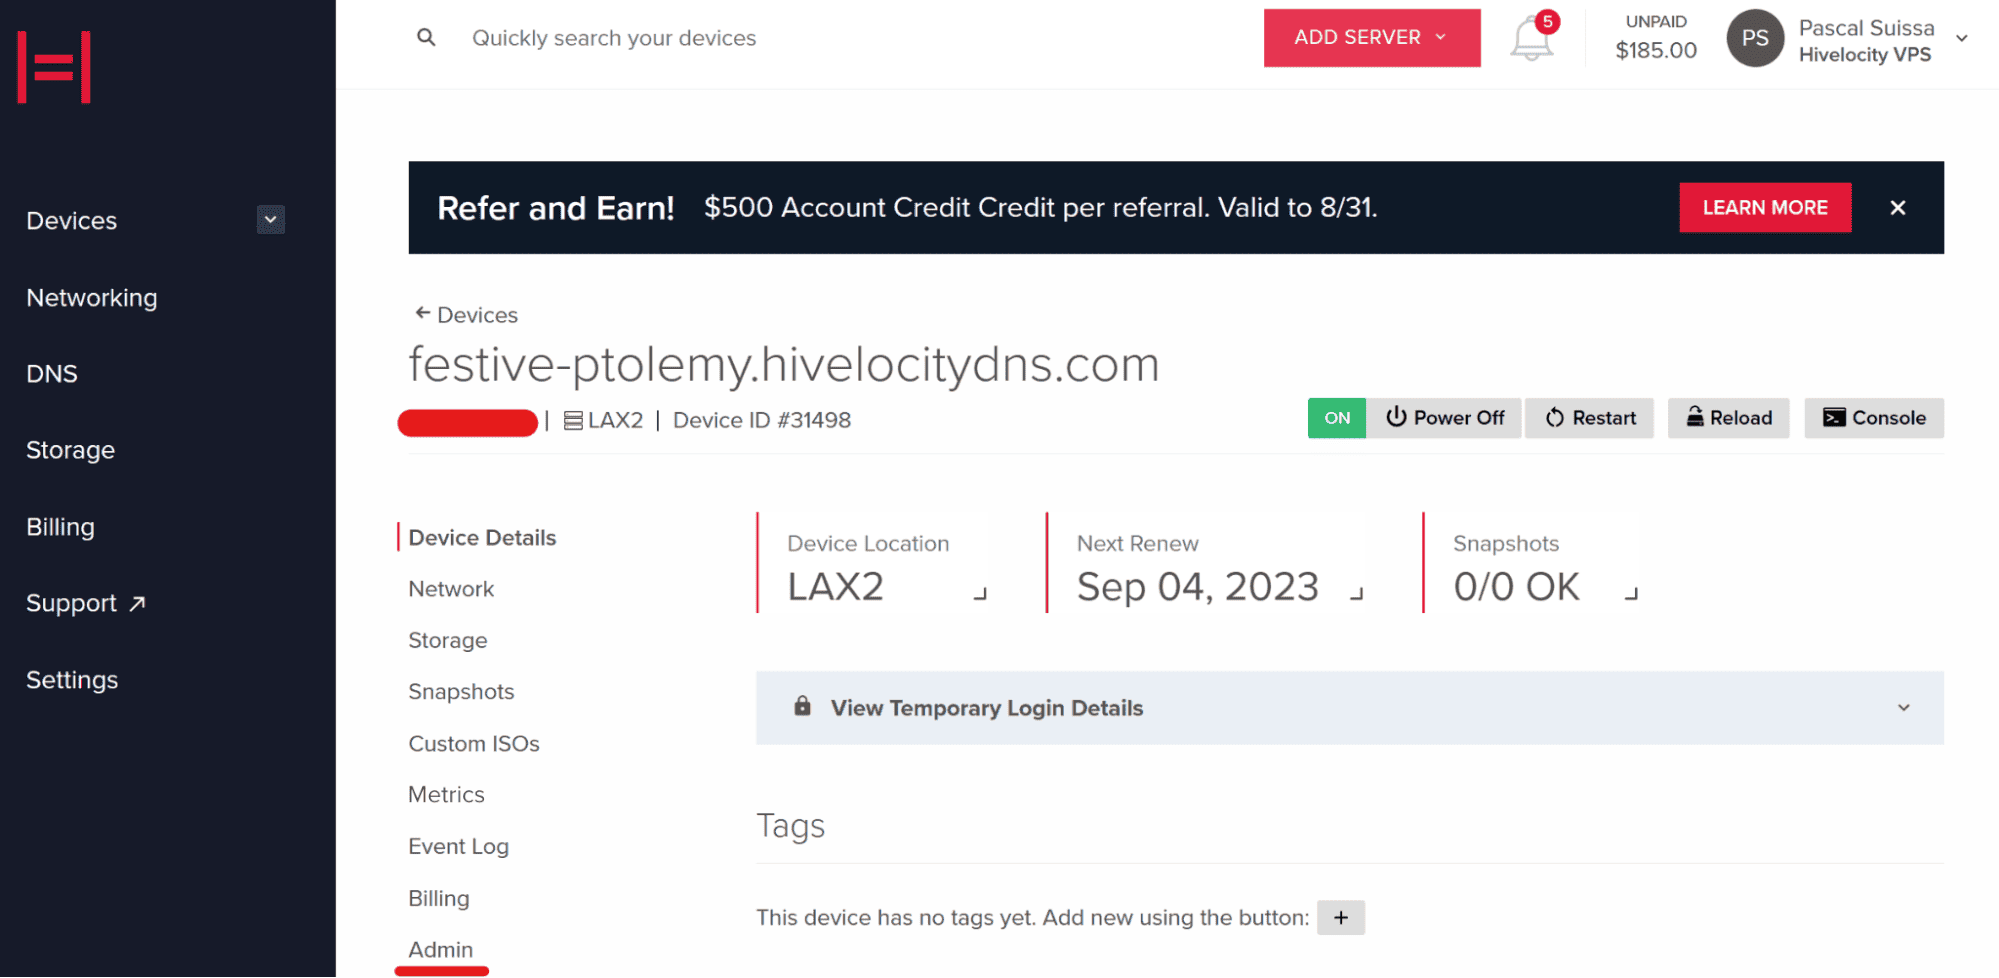
- Locate and select the device ID you wish to cancel. For this example, we will select device 31498 from the list above.
- Next, proceed to the Admin tab in the menu, as marked below.

- Once in the Admin tab of your device, select the Cancel Service button.
- A new popup window will appear displaying information prior to your cancellation. You will need to fill in a reason for leaving and make any comments you deem necessary.

- When you’re done, select the Proceed to Cancel button which will send the cancellation request.
– by Pascal Suissa